
According to Bulbapedia a Drifloon can be interpreted as the ghost of popped balloons. So, I checked my SoulSilver game to see what my Pokedex said, and it told me this:
"It is whispered that any child who mistakes Drifloon for a balloon and holds on to it could wind up missing."That's just creepy.
Anyway! As you may or may not know, yesterday was the first day that people in North America could receive the shiny Raikou from Gamestop stores. So to celebrate a friend and I made Pokemon hats! Namely, a Drifloon one. And I want to walk you through how we did it! (Don't worry, I took pictures this time!)
Now, you don't have to make a Drifloon. I would completely understand if you thought the hat would try to spirit you away. Feel free to modify this to fit whatever Pokemon you want! Or don't. Whatever works.
The actual hat is a pretty basic design. I simply looked at a hat I already owned to see how it was put together and copied it. (It's also how I measured to make sure this hat would fit.)
So! Let's get started!
What I used:
» 1/4 Yard Purple Fleece
» 1/4 Yard Yellow Fleece
» 1/4 Yard White Fleece
» Scrap piece of black felt
» Thread in Whitre, Purple, Yellow, and Black
» Poly-Fil stuffing
» Sewing Basics (Sewing machine, pins, scissors)
Total Cost (Not counting my sewing machine) Over ten dollars but under twenty.
Now, I got all of those things at my local Wal-Mart because there are no fabric stores where I live. However, I reccomend going to a fabric store instead of Wal-Mart if you can because Wal-Mart can be very hit-or-miss about what color fabrics they carry.
In case you don't know, a Drifloon looks like this:

Cute, huh?
So like I mentioned, I found a beanie-style hat I had received for Christmas (that I knew fit me the way I wanted) and measured it's height and width to figure out what measurements I wanted to use for my pattern. And then I sketched it out on the wrong side of my fabric. I'm going to be adding a 2 inch band to this project, so when I sketched the height of my hat piece, I subtracted those two inches. So:
 | ||
| (So, when I say sketched, I mean "try a million times until it's right") |
The next part is easy. Cut two of those out. (Don't forget to leave a seam allowance!) And then use the pieces you cut out as a pattern to cut out two liner pieces that are the same size. I used the white fabric as my liner.

I cut notches in the purple half-circles because the hat I modeled these after had notches in it, too.So in case you don't know, after you cut the notches, just fold the half circle (like the one in the upper right of the image) and sew the notch you just cut shut.

Now, sew up your liner pieces:

Simple, huh?
Next I cut out a band for my hat. Because I want it to be 2 inches wide, I cut it out as four inches wide, and twice as long as the base of one of my half circles, like this:

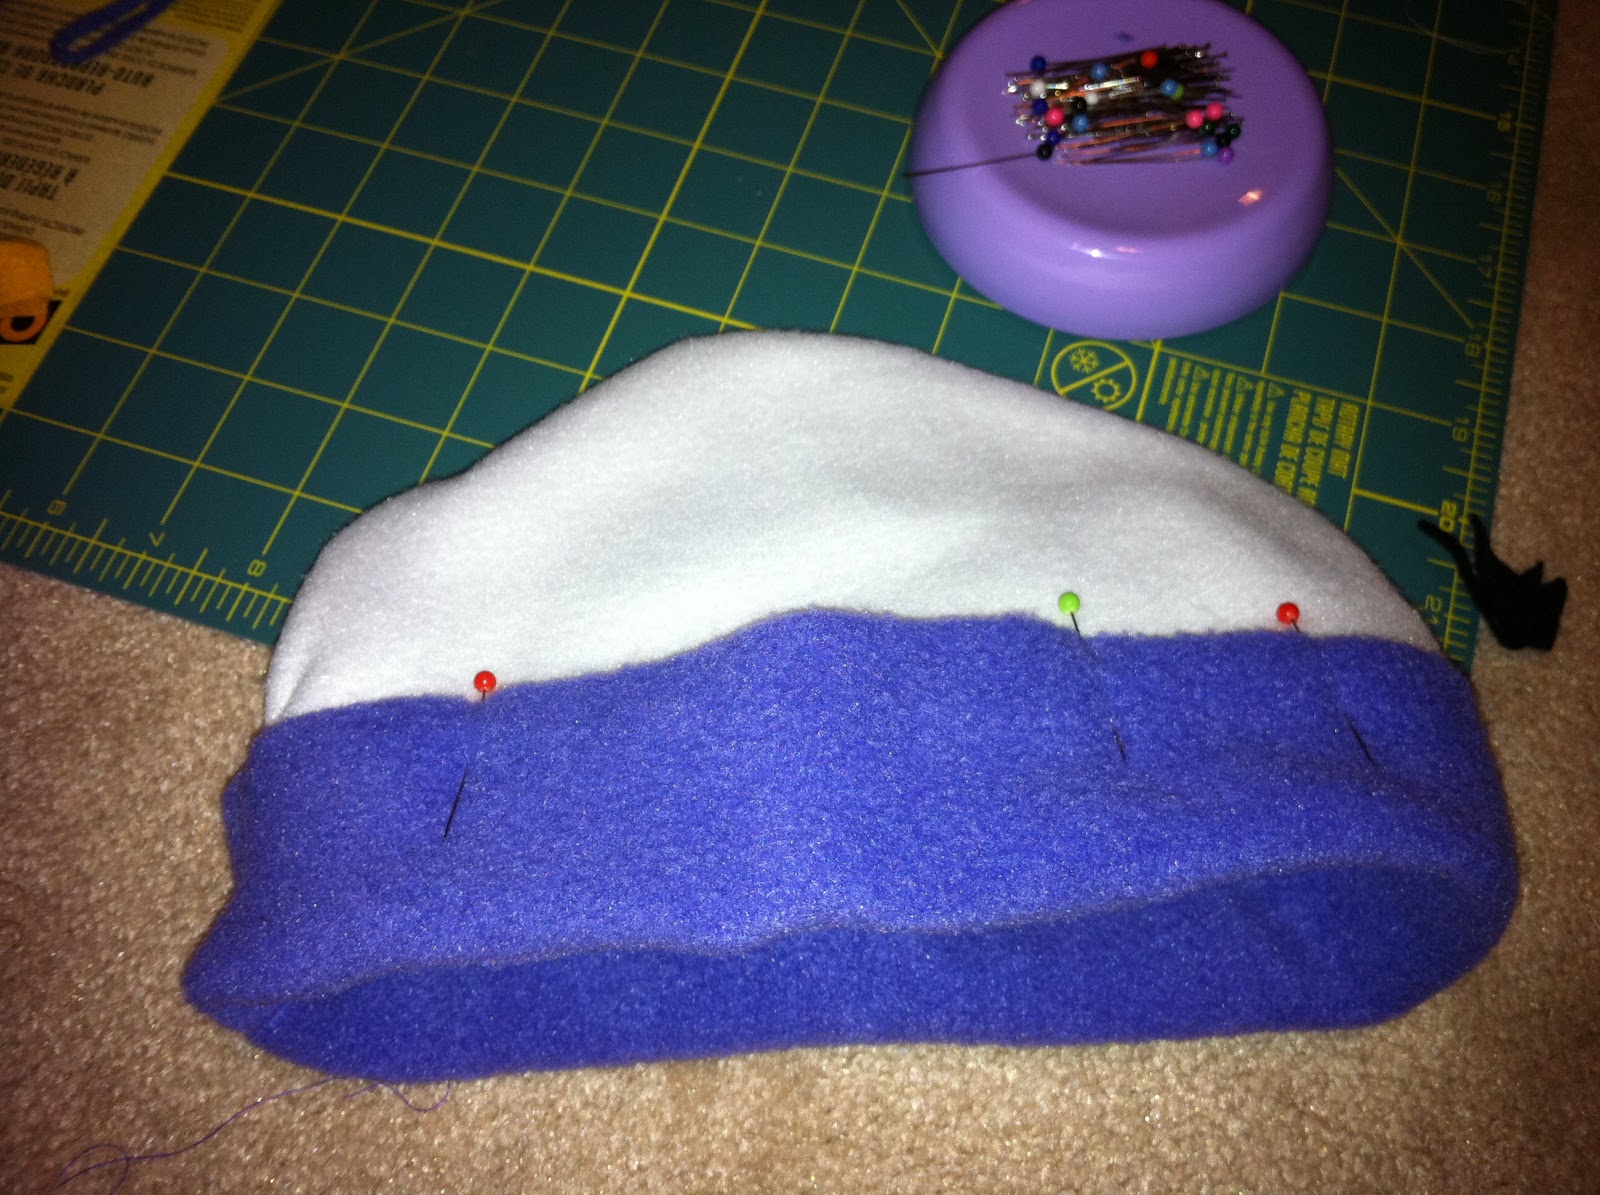
Now place your two purple half circles right-sides together, pin, and sew along the line you drew earlier. (Or, in my case, *one* of the lines I drew earlier) If you're confident as a sewer, feel free to sew over your pins. I, however, don't because they tend to break and fly back at my eyes.

Now fold the band you cut earlier in half (right sides together) and sew up the side seam. I've marked it in red on this image because I forgot to take a picture after I sewed it up.


The eyes should look something like this. Use a hand needle to pull the extra thread through to the other side and knot it.

At this point I sewed the band on. it might sound tricky, but I'm sure you can handle it. What I did was I placed the hat so that the inside the opening of the band and the bottom edges of the hat lined up (right sides of the fabric touching) and sewed it together. You could also put the liner inside at this point if you wanted. I did.


Pin and sew together, then open it all back up. It should look like this:

We're getting there! Next, cut a plus sign/x-shape out of the yellow fabric and pin it down between the hat's eyes. Sew it down using the zigzag stitch the same way you did for the eyes.

Now it's looking like a creepy ghost balloon, eh? This next part is easy. Flip the hat inside out and fold the band down so it lines up with the seam between the band and the hat. Sew it in place, taking care not to sew over the yellow X (I marked the edges of the X with two pins so I didn't sew too far) I also pinned down two black strings on either side (for the Driflloon's... hands?) and sewed over them, too.
 |
| Sorry, that's my thumb in the corner |
The main part of the hat is done! Stop and do a small victory dance!
Okay, enough dancing. Get back to work.
Cut out four small yellow hearts that are the same size.

Sew two of the four hearts together, leaving the bottom of the heart (the pointy bit) open so you can turn it inside out. Then repeat on the other two hearts.

Stick the ends of the strings in the openings of the hearts and sew those babies up!
Know that I am resisting the urge to make an open-heart surgery joke right now.

Now, for the last part, take two pieces of the white fabric you used for a liner, and sketch out a poufy cloud type shape. Cut it out and sew it up, leaving the bottom open so you can turn it inside out.

Now turn it inside out and stuff it with the poly-fil!

Okay, this part you'll have to hand sew. Get you needle and your white thread. Now sew the cloud bit onto the top of the Drifloon's head.

And you're done!

Wear your hat with pride! However, watch out for pokeballs, and don't spirit away children. It's probably illegal to do so where you live.
Thanks for joining me and I hope you enjoyed this project!
Happy crafting!
-Rae
PS: Drifloon and all other pokemon-related items mentioned above are copyrighted by Nintendo.
I stopped paying attention to Pokemon after they passed 250 but this thing *is* rather adorable. ^^
ReplyDelete